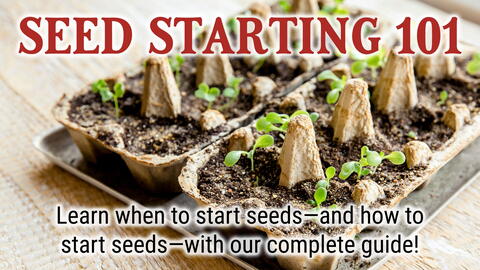
Master the Timing: When to Start Seeds Indoors for a Head Start
Embarking on the journey of starting seeds indoors is one of the most rewarding steps a gardener can take. It’s a powerful way to expand your plant palette, cultivate heirloom varieties, save money, and, most importantly, gain a significant advantage over the unpredictable outdoor growing season. By mastering the art of
how to start seeds indoors, you transform your home into a miniature nursery, nurturing delicate seedlings into robust plants ready for the garden. But while the "how-to" aspects like choosing containers, providing light, and maintaining moisture are crucial, the question of "when" to start is equally, if not more, critical for success. Getting the timing right ensures strong, healthy plants that thrive when transplanted, leading to bountiful harvests and vibrant blooms.
Why Precision Timing Matters for Indoor Seed Starting
The decision of
when to start seeds indoors isn't a guesswork game; it's a strategic calculation that directly impacts the health and productivity of your plants. Starting too early can lead to leggy, overgrown, and root-bound seedlings that struggle to adapt outdoors. These plants exhaust their pot space and nutrients prematurely, becoming stressed and more susceptible to pests and diseases even before they reach the garden. Conversely, starting too late means your plants won't have sufficient time to mature indoors, potentially delaying harvests or, for some long-season crops, preventing them from producing fruit at all before the first frost hits.
A perfectly timed indoor start allows your seedlings to develop a strong root system and a sturdy stem, reaching their optimal size and vigor just as outdoor conditions become favorable for transplanting. This head start is especially beneficial in regions with shorter growing seasons, allowing heat-loving plants like tomatoes, peppers, and eggplants to produce more fruit over a longer period. It also gives slow-growing annuals and perennials a jump on their season, ensuring earlier and more abundant flowering. Understanding these nuances is a foundational step in mastering
how to start seeds indoors successfully.
Decoding Your Seed Packets: The Ultimate Timing Tool
Your seed packets are far more than just pretty pictures; they are treasure troves of essential information, particularly when it comes to determining
when to start seeds indoors. The most critical piece of information you'll find is often a directive like "start indoors 6-8 weeks before the last frost date." This instruction is your primary guidepost.
To utilize this, you first need to pinpoint your local average last frost date. This date varies significantly by geographical location and can be easily found through a quick internet search (e.g., "last frost date [your zip code]"), checking with your local agricultural extension office, or consulting resources like The Old Farmer's Almanac. Once you have this date, simply count backward the recommended number of weeks to determine your ideal indoor sowing window. For instance, if your last frost is May 15th and a packet suggests starting 8 weeks prior, you'd aim to sow your seeds around March 20th.
Beyond the last frost guideline, also pay close attention to the "Days to Maturity" listed on the packet. This indicates how long it takes for a plant to produce harvestable fruit or flowers from the time it's transplanted outdoors. For example, a tomato variety with a 90-day maturity might need an earlier indoor start than one with a 60-day maturity, especially if you desire an early summer harvest. Furthermore, seed packets often detail specific light, water, and soil requirements, which can influence your timing strategy. Some seeds need warmth to germinate, while others require light or darkness. Being prepared to meet these environmental needs from day one is part of the comprehensive approach to
how to start seeds indoors. For an even deeper dive into seed packet wisdom, check out our guide on
Your Indoor Seed Starting Guide: Decoding Seed Packets for Success.
Not All Seeds Are Created Equal: When to Direct Sow vs. Start Indoors
While starting seeds indoors offers many advantages, it's crucial to understand that not every plant benefits from this method. Some plants simply perform better when their seeds are sown directly into the garden soil once conditions are right. Knowing the difference is a key component of effective seed starting.
Plants Best Started Indoors:
*
Long-season crops: Tomatoes, peppers, eggplants, which need a long growing season to produce fruit.
*
Slow-growing vegetables: Broccoli, cabbage, cauliflower, kale, which benefit from a head start.
*
Tender annuals: Many annual flowers like petunias, impatiens, snapdragons, and salvia grow slowly and need indoor protection from late frosts.
*
Herbs: Basil, oregano, thyme, especially if you want a supply earlier in the season.
Plants Best Suited for Direct Sowing (or with No Advantage to Indoor Starting):
*
Root vegetables: Radishes, carrots, beets, turnips. These plants strongly dislike root disturbance, which is inevitable during transplanting. Direct sowing prevents "transplant shock" that can lead to stunted or malformed roots.
*
Legumes: Beans, peas. These germinate quickly and grow rapidly, making an indoor head start largely unnecessary. They also often resent root disturbance.
*
Large-seeded, fast-germinating crops: Corn, squash (winter and summer), pumpkins, cucumbers, zinnias, sunflowers. These seeds sprout so quickly and grow vigorously that starting them indoors provides little to no real advantage and can even lead to overgrown seedlings before it's safe to plant them out.
*
Certain leafy greens: Spinach, lettuce (though some varieties can be started indoors for an earlier harvest, they also do well direct-sown).
For direct sowing, seed packets will provide optimal planting date ranges based on your USDA hardiness zone and recommended soil temperatures. Always check these instructions, as planting too early into cold soil can lead to poor germination or rotting seeds.
Beyond Timing: Key Steps for Indoor Seed Starting Success
While timing is paramount, it's just one piece of the puzzle for mastering
how to start seeds indoors. Once you've determined your sowing schedule, several other factors come into play to ensure your seedlings thrive:
*
Choose the Right Containers: From reusable plastic trays to peat pots or even DIY options like egg cartons (with drainage!), ensure your chosen containers are clean and have adequate drainage holes.
*
Select the Best Growing Medium: Ditch heavy garden soil or standard potting mix for a specialized seed-starting mix. These mixes are typically sterile, fine-textured, and provide the ideal drainage and aeration for delicate seedlings, preventing damping-off disease.
*
Provide Ample Light: Natural windowsill light is often insufficient, leading to leggy, weak seedlings stretching for light. Invest in fluorescent or LED grow lights positioned just a few inches above your seedlings for 12-16 hours a day. This is one of the most critical investments for robust indoor growth.
*
Maintain Optimal Moisture and Humidity: Keep the seed-starting mix consistently moist but never waterlogged. A spray bottle works well for gentle watering. Covering trays with a humidity dome or plastic wrap can help maintain moisture levels for germination, but remove it once seedlings emerge to prevent fungal issues.
*
Ensure Proper Temperature: Most seeds germinate best in warmer temperatures (65-75°F / 18-24°C). Seedling heat mats can significantly improve germination rates, especially for heat-loving crops.
*
Harden Off Your Seedlings: This crucial step transitions your tender indoor-grown plants to the harsher outdoor environment. Gradually expose them to increasing periods of direct sunlight, wind, and cooler temperatures over 7-14 days before transplanting. Skipping this step often results in stressed, damaged, or even dead plants.
Each of these steps contributes to developing strong, resilient seedlings capable of flourishing in your garden. For a comprehensive walkthrough of the entire process, including detailed supply lists and step-by-step instructions, our guide on
Healthy Seedlings Start Here: Essential Steps for Indoor Growing is an invaluable resource.
By meticulously planning your sowing dates based on your last frost date and seed packet instructions, and then providing the optimal environment, you'll be well on your way to a thriving garden. Starting seeds indoors is a journey of learning and adaptation, but with these principles, you'll confidently give your plants the best possible start.
Conclusion
Mastering the timing of
when to start seeds indoors is a foundational skill for any gardener looking to expand their growing season and enjoy a more productive and diverse garden. By understanding the critical role of your last frost date, meticulously reading seed packet instructions, and discerning which plants truly benefit from an indoor head start, you set the stage for success. Combine this precise timing with the essential care steps for indoor seedlings – adequate light, moisture, and proper hardening off – and you'll soon be enjoying the immense satisfaction of cultivating a vibrant garden from the tiny seeds you nurtured with your own hands. Happy gardening!