Healthy Seedlings Start Here: Essential Steps for Indoor Growing
Embarking on the journey of indoor seed starting is one of the most rewarding aspects of gardening, offering a profound sense of accomplishment and a significant head start on the growing season. Learning how to start seeds indoors transforms a simple packet of potential into a vibrant collection of seedlings, ready to flourish in your garden. This method not only empowers you to cultivate a wider variety of plants, including rare heirlooms and specialty flowers often unavailable as nursery starts, but also provides a cost-effective alternative to buying mature plants. By mastering the essential steps of indoor growing, you unlock the secret to strong, healthy seedlings that will form the foundation of a thriving garden.
Why Start Seeds Indoors? Unlocking a World of Possibilities
The decision to start seeds indoors extends far beyond mere convenience; it's a strategic move for any avid gardener. Here’s why mastering how to start seeds indoors is a game-changer:
- Economical Growth: Purchasing individual plant starts from nurseries can quickly add up. A single packet of seeds, however, contains dozens, sometimes hundreds, of potential plants for a fraction of the cost, making indoor seed starting incredibly budget-friendly.
- Early Harvests: For regions with shorter growing seasons, starting seeds indoors gives heat-loving plants like tomatoes, peppers, and eggplants the crucial extra weeks they need to mature and produce a bountiful harvest before the first frost. This head start means you'll enjoy fresh produce weeks, or even months, earlier than if you waited to direct sow.
- Unparalleled Variety: Local nurseries often carry only the most popular plant varieties. By starting from seed, you gain access to an astonishing array of heirloom vegetables, unique ornamental flowers, and specialized herbs that might otherwise be impossible to find. This allows you to truly customize your garden to your preferences.
- Control Over Conditions: From the moment your seeds germinate, you have complete control over their environment. This means you can ensure they are grown organically, free from pesticides, and provided with optimal light, water, and soil conditions right from the start, setting them up for robust health.
- Beat the Winter Blues: For many, the act of nurturing tiny seedlings indoors provides a much-needed connection to nature during the colder months, alleviating winter doldrums and building anticipation for spring.
Timing is Everything: When to Start Seeds for Success
One of the most critical aspects of learning how to start seeds indoors is impeccable timing. Starting too early can result in leggy, overgrown, and root-bound seedlings that struggle to adapt outdoors, while starting too late might negate the advantage of indoor growing altogether. Your best friend in this endeavor is the "last frost date" for your specific region.
Most seed packets provide guidance like "start indoors 6-8 weeks before the last frost date." To find your local last frost date, a quick internet search for "last frost date [your city/zip code]" will typically yield reliable results. Once you have this date, simply count backward the recommended number of weeks to pinpoint your ideal seed-starting window. For a deeper dive into this crucial topic, we highly recommend reading our detailed guide: Master the Timing: When to Start Seeds Indoors for a Head Start.
However, not all plants benefit from an indoor head start:
- Plants Better Direct-Sown: Some plants despise transplanting due to their delicate root systems. Root vegetables like radishes, carrots, and beets, as well as row crops like beans and corn, are typically best sown directly into the garden. Disturbing their roots can stunt growth or cause bolting.
- Fast Germinators: Certain crops germinate and grow so rapidly that starting them indoors offers little to no advantage. Cucumbers, zucchini, and most squash varieties, along with flowers like zinnias and sunflowers, fall into this category. They quickly catch up to their indoor-started counterparts once outdoor conditions are favorable, and often establish stronger root systems when direct-sown.
Always consult your seed packets for specific recommendations, as they are tailored to the plant's unique growth habits.
Decoding Your Seed Packets: Your Indoor Growing Blueprint
Before you even think about putting seed to soil, the tiny text on the back of your seed packet holds a treasure trove of vital information. This isn't just arbitrary data; it's your personalized blueprint for success when learning how to start seeds indoors. Ignoring these instructions is like trying to build furniture without a manual – frustrating and often unsuccessful. For a comprehensive walkthrough of what to look for, explore our dedicated article: Your Indoor Seed Starting Guide: Decoding Seed Packets for Success.
Key information to seek out includes:
- Planting Time: This will clearly state whether the seeds should be started indoors, direct-sown, or if indoor starting is optional. For instance, in colder climates, long-season crops like tomatoes and peppers are virtually mandatory to start indoors to ensure maturity before frost.
- Days to Maturity: This figure tells you how long it takes from planting (or transplanting, in some cases) to harvest or flowering. If a tomato variety takes 100 days to mature and you want ripe tomatoes by July, you'll need to start those seeds by early April, factoring in the last frost date. This information is crucial for planning your harvest schedule.
- Light Needs: Some seeds require light for germination, while others prefer darkness. Post-germination, all seedlings demand abundant light. The packet will guide you on whether a sunny window will suffice or if supplemental fluorescent grow lights are necessary to prevent leggy, weak seedlings.
- Water Needs: While general guidance for consistent moisture applies, some specific needs might be noted. The key is never to let the seed-starting mix dry out completely, nor to let it become waterlogged.
- Soil Needs: This is a critical detail. While some larger seeds might tolerate ordinary potting soil, most seeds, especially tiny ones, thrive in a fine-grained, sterile seed-starting mix. These mixes are designed to be light, well-draining, and free of weed seeds or pathogens that can harm tender seedlings. Some packets may also suggest an optimal soil temperature for germination, often achieved with a seedling heat mat.
- Seed Depth and Spacing: Always follow the recommended depth. A general rule of thumb is to plant seeds two to three times their diameter deep, but exceptions exist. Proper spacing helps prevent overcrowding and encourages robust growth.
Essential Steps for Nurturing Your Seedlings
Once you've decoded your seed packets and determined your timing, it's time for the hands-on work of learning how to start seeds indoors and care for your nascent garden. This systematic approach will ensure your seedlings grow strong and vibrant.
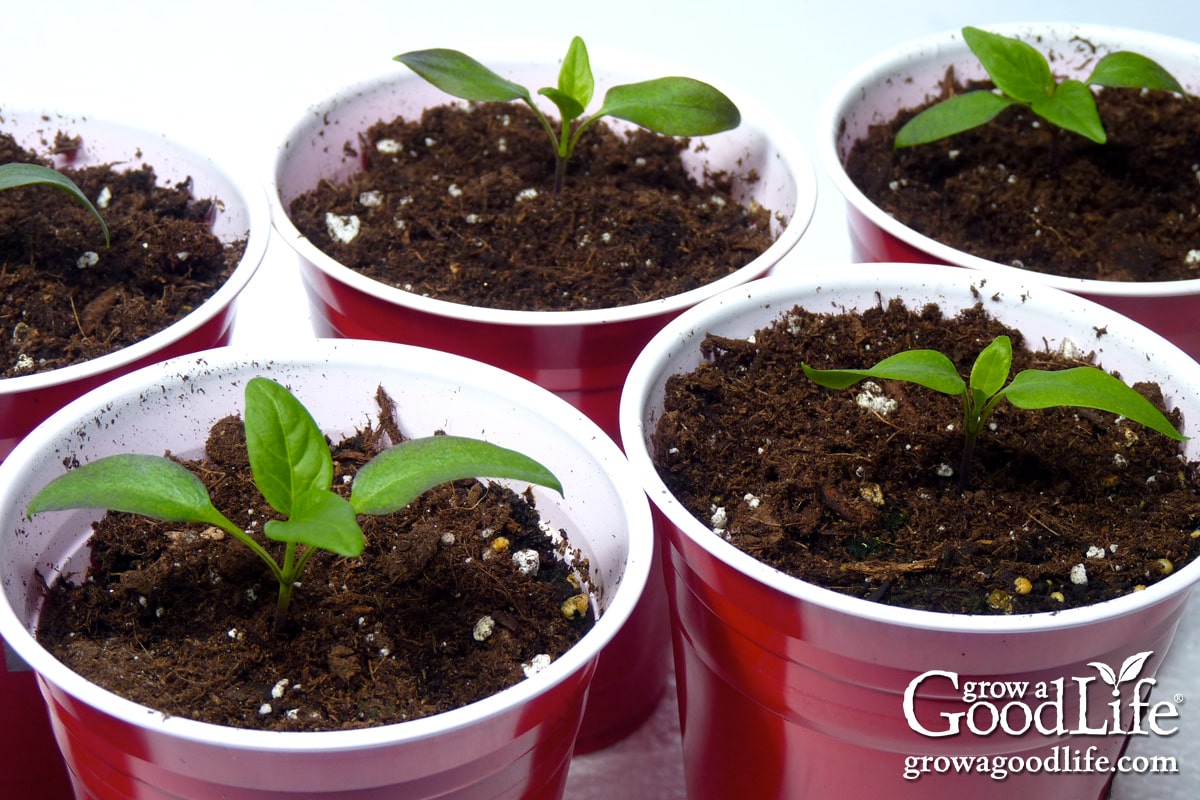
1. Choose the Right Containers
The options for seed-starting containers are vast, from specialized plastic cell trays and peat pots to repurposed yogurt cups or egg cartons (ensure they have drainage holes!). Whatever you choose, make sure it's clean and has adequate drainage. Sterilizing old containers with a 10% bleach solution can prevent the spread of diseases.
2. Prepare Your Seed-Starting Mix
Use a high-quality, sterile seed-starting mix. Avoid garden soil or heavy potting mixes, which can harbor pathogens, compact easily, and inhibit delicate root growth. Moisten the mix thoroughly before filling your containers; it should be damp but not soggy, like a wrung-out sponge.
3. Sow Your Seeds with Precision
Follow your seed packet's instructions for planting depth and spacing. For tiny seeds, simply sprinkle them on the surface and lightly press them into the soil, or cover with a thin layer of vermiculite. Label each container immediately with the plant name and sowing date to avoid confusion later!
4. Provide Optimal Germination Conditions
- Warmth: Many seeds germinate best with consistent bottom heat. A seedling heat mat placed under your trays can significantly improve germination rates and speed. Once germinated, most seedlings prefer slightly cooler ambient temperatures.
- Moisture: Keep the seed-starting mix consistently moist but never waterlogged. A spray bottle can be used for initial watering, and bottom watering (placing trays in a shallow pan of water) is excellent once seedlings emerge, encouraging root growth downwards.
- Humidity: Covering trays with a clear plastic dome or plastic wrap can create a mini-greenhouse effect, maintaining humidity crucial for germination. Remove the cover once most seeds have sprouted to improve air circulation.
5. Light: The Lifeblood of Seedlings
As soon as your seeds germinate and tiny green shoots appear, light becomes paramount. Seedlings need 12-16 hours of intense light per day. A sunny south-facing window might be insufficient, leading to "leggy" seedlings that stretch towards the light, resulting in weak stems. Supplemental grow lights are often essential. Position them just 2-4 inches above the seedlings, adjusting the height as they grow to prevent stretching.
6. Water and Air Circulation Post-Germination
Continue to water consistently, allowing the top layer of soil to dry slightly between waterings to prevent fungal issues like damping-off. Good air circulation is also vital; a small fan set on a low setting for a few hours a day can strengthen stems and reduce disease risk.
7. Fertilization and Thinning
Once your seedlings develop their first "true leaves" (the second set of leaves after the initial cotyledons), they'll be ready for a dilute liquid fertilizer (e.g., half-strength organic fish emulsion or balanced liquid feed). If you sowed multiple seeds per cell, thin them to the strongest single seedling by snipping the weaker ones at the soil line with small scissors, rather than pulling, which can disturb adjacent roots.
8. Hardening Off: The Grand Transition
Before transplanting your robust seedlings outdoors, they need a gradual transition period known as "hardening off." Over 7-14 days, expose them incrementally to outdoor conditions – direct sunlight, wind, and cooler temperatures. Start with a few hours in a sheltered, shady spot, gradually increasing their exposure time and intensity. This critical step prepares them for the rigors of the garden and prevents transplant shock.
Conclusion
Starting seeds indoors is more than just a gardening task; it's an act of hopeful anticipation and mindful nurturing. By understanding how to start seeds indoors, paying close attention to timing, deciphering the wisdom of your seed packets, and consistently applying proper care, you lay the strongest possible foundation for your plants. The journey from a tiny seed to a vibrant seedling under your watchful eye is incredibly rewarding, culminating in a flourishing garden filled with the fruits (and flowers!) of your labor. Embrace the process, learn from each batch, and soon you'll be enjoying the unparalleled satisfaction of a garden grown entirely by your own hand.
